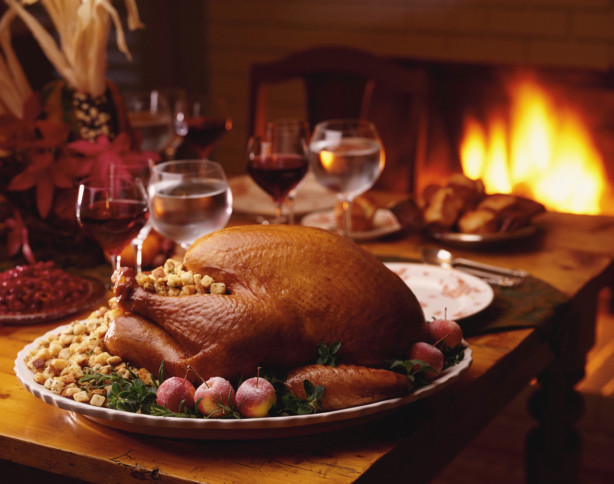
 I love Thanksgiving dinner, and with a little planning it can be one of the easiest meals to make. What can make the meal tricky is the timing. Allowing ample time for defrosting your turkey, if you get the free frozen one from ShopRite like I do, cooking your turkey, letting the turkey rest, and then carving and serving your turkey is important for meal planning. It’s not impossible; it just involves a little math and counting backwards. If this is your first time preparing and hosting Thanksgiving dinner, I hope this will be helpful.
Timing Your Meal: To cook a 15-pound turkey on Thursday, start the defrosting on Sunday afternoon in the refrigerator. A typical stuffed 15-pound turkey will require 3 hours and 45 minutes to cook plus another 30 minutes for the stuffing—for a total of 4 ½ hours. If you’re planning to eat around 3 p.m. on Thursday, start cooking your stuffed turkey at 10 a.m. This also allows for 30 minutes of resting time so the juices stay inside your turkey rather than immediately leaving it upon carving.
Defrosting Your Turkey: Defrosting a turkey follows a pretty simple formula. Allow 24 hours in the refrigerator for each 4 to 5 pounds of turkey. Because of bacteria, a turkey should not be defrosted on the counter at room temperature, so you’ll want to plan ahead on this one. I can’t tell you how many times I’ve forgotten to take my turkey out until a day later, and then gone into panic mode on Thanksgiving morning. This can be especially challenging when that package of turkey organs is stuck where I need to be putting my stuffing.
Stuffing Your Turkey: There has been a fair amount of debate around whether or not to stuff a turkey before cooking it. The reason is this: if the temperature in the center of the bird doesn’t get high enough, bacteria from the raw turkey will mix with the stuffing and there isn’t enough heat to kill it. Some chefs recommend cooking the stuffing separately (technically it is then called dressing) to avoid bacterial issues. I’ve always stuffed my turkey and then cooked it, and so has my mother. I’m still here with no bacterial issues to report.
Flavoring Your Turkey: While there are several ways to do this (brining, flavor injecting, and a seasoned spice rub) I typically choose the easiest, which is a seasoned compound butter. Compound butter is very easy to make and can be flavored in any way you want.To make compound butter, allow a stick of butter to soften at room temperature. Place it in a bowl, add your favorite seasonings, and mix with a fork. I usually combine kosher salt, pepper, poultry seasoning, and then a blend from Urban Accents called Tuscan Villa, which includes rustic sage and thyme. After you rinse and pat dry your turkey, rub the compound butter all over the turkey on top of the skin, and underneath the skin if you want.
Cooking Your Turkey: The proper timing for cooking the turkey is also something with which I’ve had challenges. (I can finally understand why the timing of Thanksgiving dinner was so often pushed back, and back, and back.) As a general rule, one should allow 12 to 15 minutes per pound of turkey in a 350 degree oven. If you stuff your turkey, which I always do, you will need to add an additional 30 minutes to your cooking time. A stainless steel roasting pan with low sides promotes browning of the skin (my favorite part of the turkey) and also makes it easier to make gravy from your pan drippings (another Thanksgiving favorite).
Carving Your Turkey: This can either be a fun thing to do or the scariest aspect of your meal. Typically, I “wing it” (no pun intended) and any of my carving expertise comes from years of watching my father. With some additional detailed instruction from Cuisine Inspirations, here are steps to carving a turkey that are easy to follow and will help contribute to a delicious meal.
- Remove the legs and wings: While holding the tip of the leg, make a slice between the leg and body, pushing the knife as far down as you can. Once this cut is made, gently pull the leg down and away from the body (this will remove the thigh joint from the body). It is important to pull the leg downward, since the thigh joint is underneath the body. Repeat with the other leg. Follow the same technique to remove the wings
- Remove the breast meat: Make one vertical slice on each side of the breastbone from the front to the back. Using your knife, you should be able to feel the breastbone, using it as a guide for each of your cuts. Next, make a horizontal cut directly above the leg and wing joints (i.e. hold the knife with the blade parallel to the cutting board, and make a continuous slice starting above the leg joint and ending above the wing joint, or vice versa). Repeat with the other side. Once this cut is made, each breast-half will fall off in one large piece which can be cut into smaller slices by making cuts from the top of each piece to the bottom. This technique ensures that each slice of breast meat will contain a piece of skin.

